Friday, 26 July 2013

Wax-Resist Turtles


By Jeff (Grade 2)

Lesson Background:

These artworks are inspired by our class novel from last term: Nim's Island, by Wendy Orr.
I got this gorgeous art lesson idea from the art blog: For the Love of Art http://artiswhatiteach.blogspot.ca/2010/04/3rd-grade-sea-turtles.html
Three lovely Year 2 students from my class have typed up the recount/procedure for this artwork below.  Well done Ben, Paige and Nive!

Materials (per student):

-  A4 piece of white art paper
-  Oil pastels [ Colours: brown, green, light green, yellow, orange, red, black, grey and white]
- Blue ink
-A large paintbrush
-A3 black art paper

Steps:

1.  We looked at some pictures of turtles on the computer.
2.  We discussed the colours, shapes and patterns we could see on the turtles.
3.  We drew the turtles step-by-step, following our teacher as she drew.  We used pebble-shaped patterns for the face, neck and fins.  We used hexagon or diamond patterns for the shell.
4.  We coloured out turtle artworks with oil pastels, trying to use colours that blended well together.  We  needed to leave white gaps at the edges of each shape, so that the blue ink would be washed into the gaps.
5.  We outlined the turtles in white oil pastel.
6.  We washed the blue ink over our artworks with a large paintbrush, making sure we painted right to the edge of the page and left no puddles of ink.
8.  We put our artworks on the drying rack to dry.
9.  We put black A3 backing paper on the back of our artworks.

Grade 1/2 Artworks:

 
By Ella (Grade 1)

By Agnes (Grade 2)

By Paige (Grade 2)

By Millie (Grade 2)

By Ben (Grade 2)

By Kayla (Grade 2)

By Austin (Grade 2)

By Sophia (Grade 2)
 
1/2B's beautiful sea turtle artworks

My sample drawings


Monday, 13 May 2013

Palm Tree Island Silhouettes

By Ethan (Grade 1)

Lesson Materials (per child):
-  1 sheet A4 white art paper
-  watercolour paints
-  water
-  paintbrushes

Lesson Steps:
1.  We lightly drew the outline of the ground and palm trees.
2.  We painted a yellow wash over the background and then painted in streaks of red, orange and purple.
3.  When dry, we painted the palm trees and ground with black paint.

Student Artworks:
By Angela X (Grade 1)

By Paige (Grade 2)

By Ella U (Grade 2)


By Annabel (Grade 1)

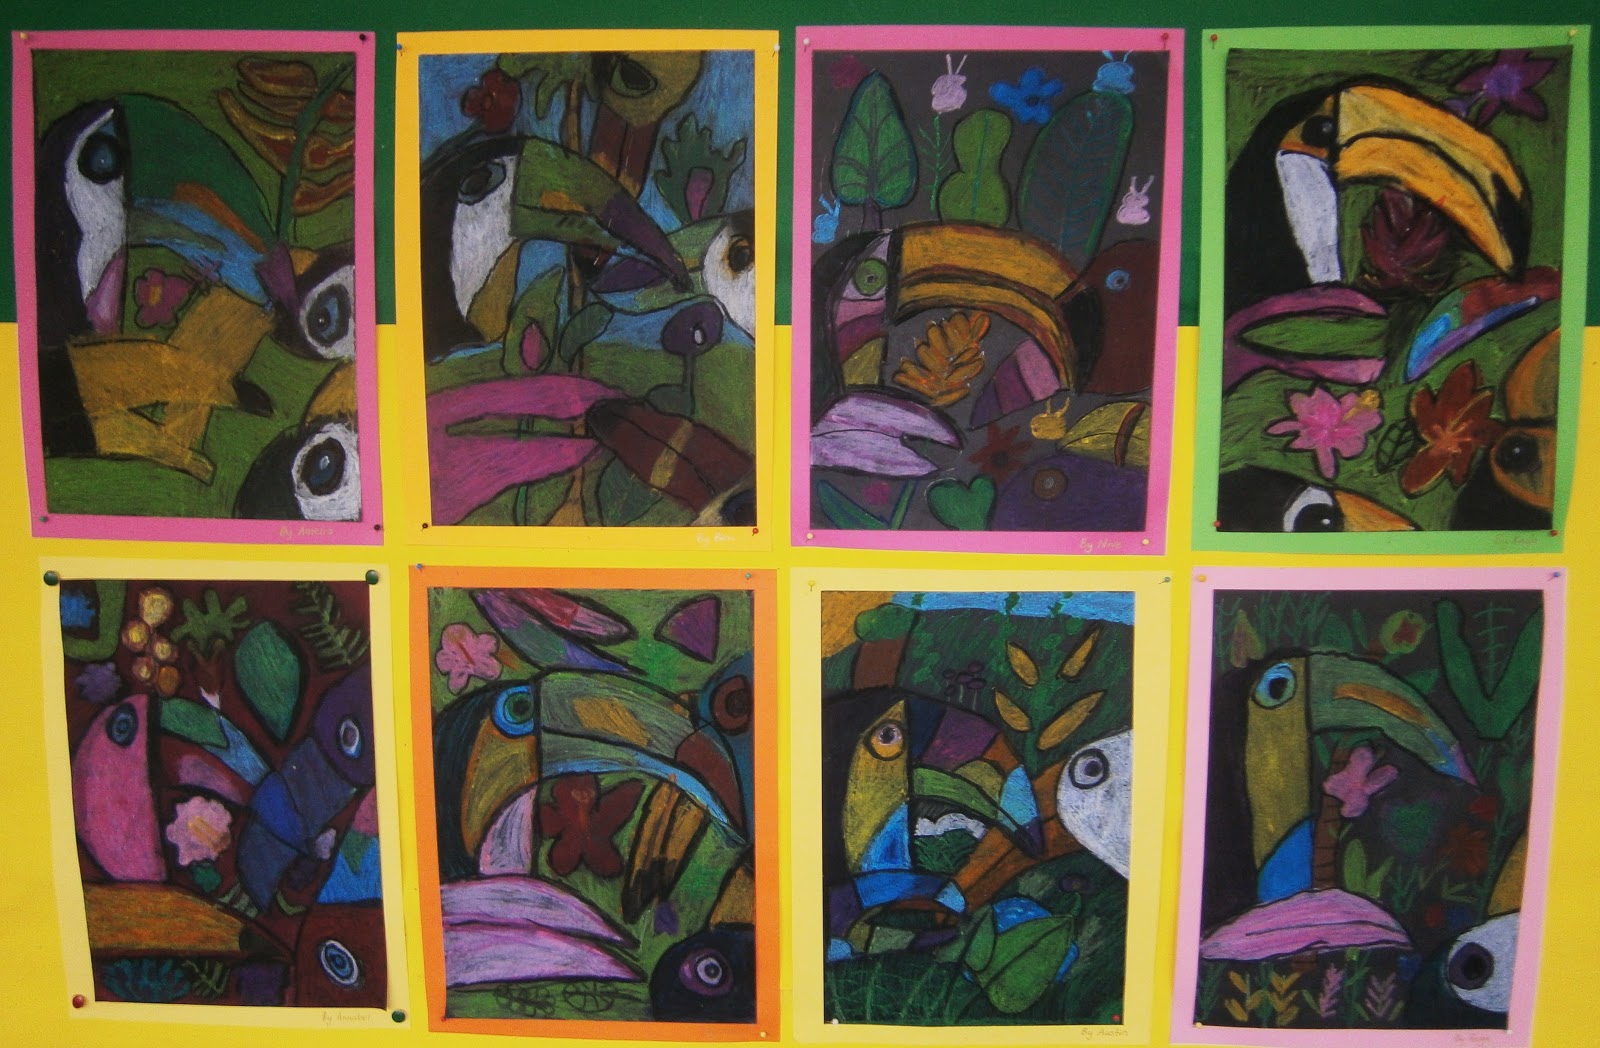
Some of 1/2B's island artworks above our toucan drawings

Friday, 3 May 2013

Grade 1/2 Iguana Drawings

By Ben (Grade 2)

Lesson Background:
This is another tropical island-themed artwork we did this week, based on our class novel "Nim's Island" by Wendy Orr.  This lesson was taught by the internship student who is currently teaching in our class, Miss Fielding.  I know my class and I all think she did a superb job helping everyone to create these wonderful artworks! 

Lesson Materials (per child):
1 sheet A4 white art paper
Coloured progresso pencils

Lesson Steps:
1.  We looked at photos of iguanas and discussed their colours, patterns and shape.
2.  We drew the iguanas with step-by-step teacher modelling of each small part.  Students were asked to identify what shape each part of the iguana's body was.
3.  Students coloured in their iguanas with progressos, trying not to leave any white gaps.  More-able students were encouraged to incorporate shading and different tones in their colouring.
4.  Students then looked at photos of tropical plants, and drew these into their artworks.
5.  Once the artwork was completely coloured, students outlined all large shapes with black progresso.

Grade 1/2 Artworks:


By Millie (Grade 2)

By Joss (Grade 2)

By Austin (Grade 2)


By Josh (Grade 1)

By Paige (Grade 2)

By Kimo (Grade 1)

By Xander (Grade 2)

By Eve (Grade 2)
 

Grade 1/2 iguana drawings

Thursday, 2 May 2013

Grade 1/2 Oil Pastel Toucans

By Kayla (Grade 2)

Lesson Background:
We have started reading Nim's Island by Wendy Orr as our class novel for this term, so I decided to spend a few weeks creating some tropical island art.  This is our first artwork for the term.  I got the idea for this artwork from Donna Hugh's art project for kids: http://www.coycreek.com/animalsoftherainforestartlessonsforchildrenvol5dvd.aspx

Lesson Materials (per child):
1 sheet A4 black card
Oil pastels

Lesson Steps:
1.  We looked at photos and a video of toucans.  We discussed the colours and textures.
2.  We drew the toucans, with me guiding the students step-by-step ( I drew a shape, then the children drew theirs).
3.  Students were encouraged to have 1-4 toucans, in any position they liked.
4.  We looked at photos of tropical plants and flowers.  The students then drew and coloured these in their artworks.
5.  The students outlined the toucans and large plants in black oil pastel.

Grade 1/2 Artworks:


By Eve (Grade 2)

By Angela X (Grade 1)


By Austin (Grade 2)

By Paige (Grade 2)


By Ella U (Grade 2)
By Ben (Grade 2)

By Agnes (Grade 2) 
By Ella B (Grade 1)

By Leo (Grade 1)

By Xander (Grade 2)

By Kimo (Grade 1)

By Annabel (Grade 1)


Thursday, 25 April 2013

Grade 1/2 Charcoal Self-Portraits

By Angela (Grade 1)
Lesson Materials (per child):

-  1 piece of charcoal
-  1 half of a photocopied A4 photograph of themselves
-  Fixative or hairspray

NOTES:
I photocopied the photos onto art paper.
I used compressed synthetic charcoal- it doesn't break as easily!

Lesson Steps:

1.  We looked at photographs off Google Images and talked about facial symmetry and proportions.  We use our fingers to measure between our eyes and nose, the width of our cheeks, etc.
2.  I showed the students how to hold the charcoal, draw fine lines by using sharp edges, and smudge the charcoal by smearing it on the paper with their fingers.
3.  I modelled how to use their own fingers to make rough measurements and draw facial features in symmetrically.  (E.g. "I can see that this eye is 2 finger spaces wide and 1 finger space high, so I will do the same on the other side of the paper")
4.  The students went back to their desks and drew the outline of their faces and the main facial features.
5.  I then encouraged the students to look closely for fine lines, dimples, shadows, etc and to go back and add them in.
6.  We then talked about how to fill in the background by adding smudged shadows and drawing in missing objects behind themselves in the photo.

Student Artworks:

These artworks were my students' first-ever attempts at using charcoal.  I think they have done extremely well, and I love the way you can see a hint of their gorgeous personalities in their portraits- Well done, guys!

By Kayla (Grade 2)

By Jeff (Grade 2)
 
By Rohan (Grade 2)
 

By Ben (Grade 2)

By Austin (Grade 2)

By Sophia (Grade 2)

My modelled drawing using the delightful Ella's photo

What do you think?
Please feel free to comment... my class love getting positive feedback from people who view their art online!