Thursday, 15 September 2011

Hogwarts Watercolour Castles

3B's beautiful watercolour Hogwarts castles
Lesson Background:
At the moment the Year 3 and 4 students at my school are engaged in a unit of work based on Harry Potter.  The children have been reading the story, analysing its language features and narrative techniques, making wands and potions, and getting "sorted" into the four Hogwarts houses.  It's been a lot of fun!  I saw a fabulous lesson on Deep Space Sparkle and decided to use it as an idea for creating some watercolour Hogwarts castle paintings.  http://www.deepspacesparkle.com/2010/05/castles-in-watercolor-and-marker/

Photos from around our "Hogwarts" classroom:


The table (Hogwarts houses) points tally

some of the potions...

"Professor" Baker's messy desk!
Lesson Steps:
1)  I showed the students photos of me in front of different real-life castles (when my husband and I lived in England for a year, he worked at English Heritage and we were given free visits to a lot of castles around England).  We talked about their architectural features, what they are made of and what colours and textures they have.
2)  The students brought their A3 art paper and pencils to the floor and we drew sections of the castle step-by-step.  For example, I would model how to draw a turret and then they would put in however many turrets they wanted, etc.  The students were encouraged to make their castles unique- some added moats, some added triangular tops on their turrets, some had snowy mountains in the background, etc.
3)  Once the drawings were complete, I showed the students how to use watercolour paints (including lightly painting big sections with water before putting the colour on, and how to mix colours and use water to achieve different tones).
4)  The students painted their castles.  I also showed students how they could use flecks of black or grey paint to show texture on their castle walls. 
5)  Once the paintings were dry, I demonstrated how to draw on the bricks.  Students then did this with a black permanent marker.

Year 3 Artworks:

By Liam


By Kundai


By Denzelle

By Keyan


By Angus


By Charlotte


By Tim

By Alex (2010)

Wednesday, 31 August 2011

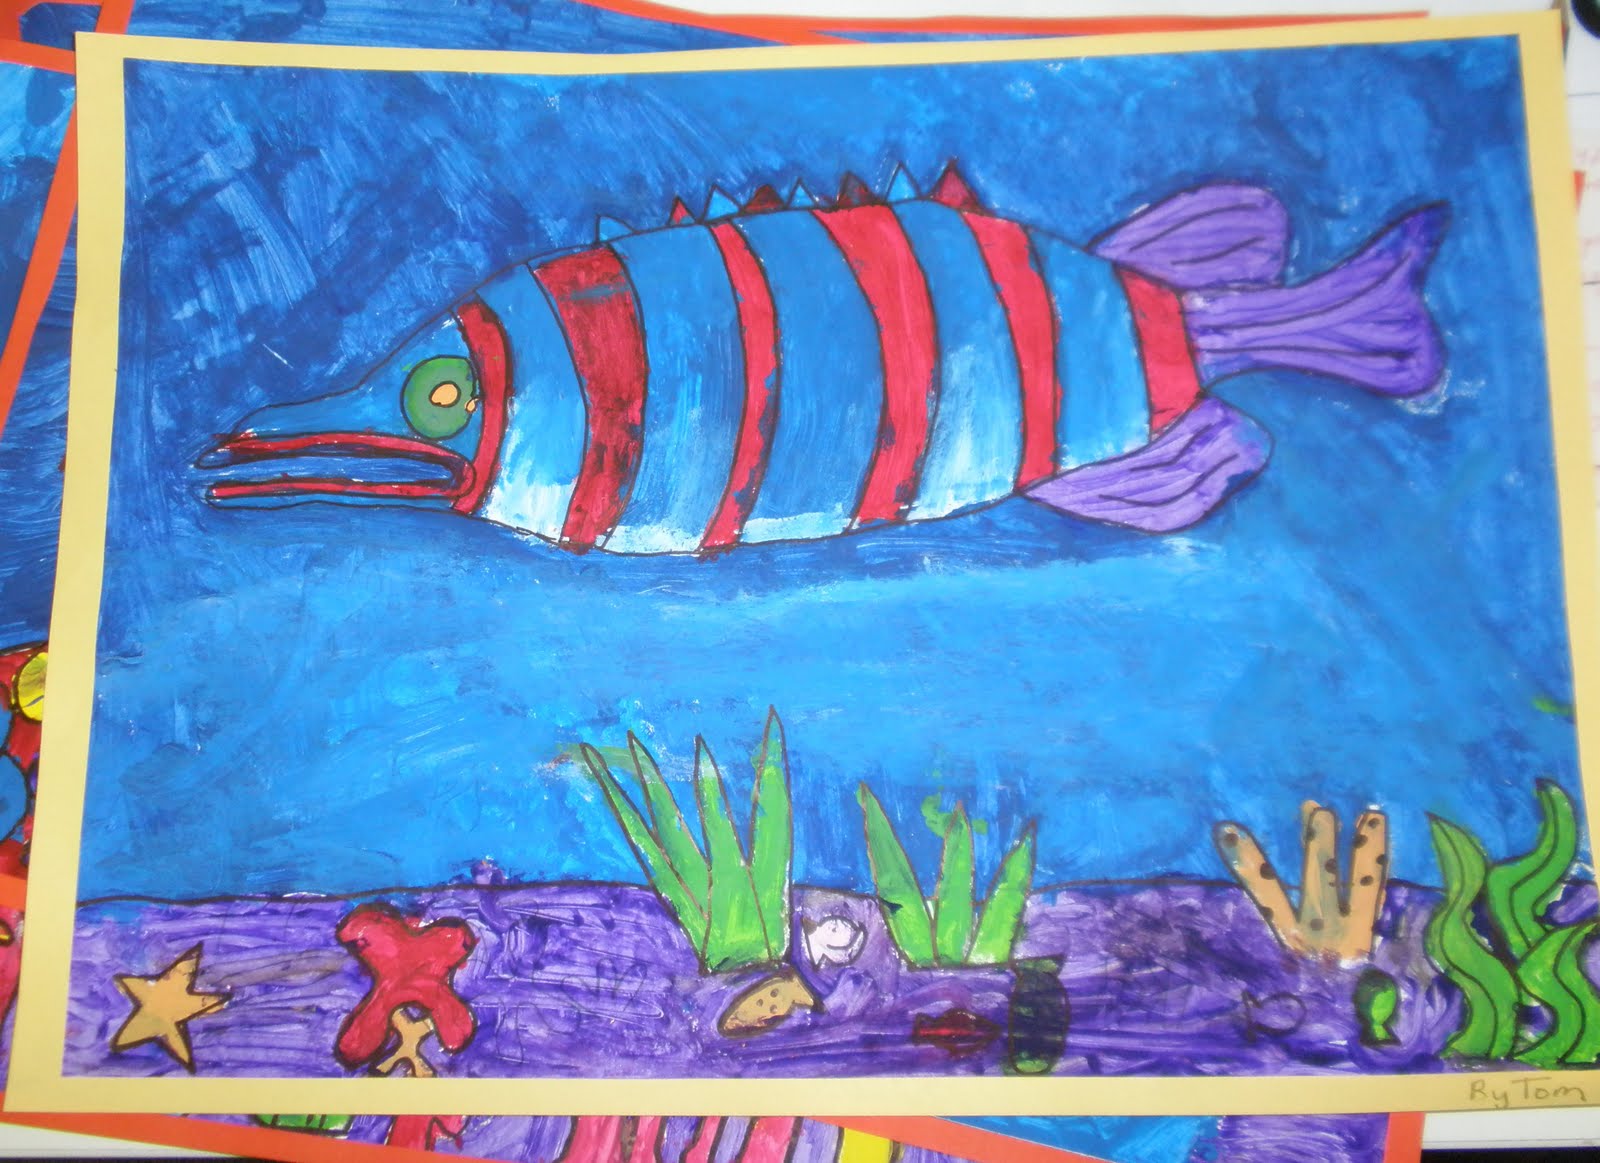
Great Barrier Reef Paintings

 
By Tim, (Year 3), 2011

Lesson Background:
As a part of our unit of work on Australian geography, icons and landmarks, I decided my class would enjoy producing some paintings of the Great Barrier Reef.  They loved seeing photos of the brightly coloured fish and coral and tried to recreate this in their artworks.  I think they did very well!  We used the stunning artwork by Des Spencer (see below) as well as lots of photographs, for inspiration:
http://www.great-barrier-reef-holiday.com.au/great-barrier-reef-holiday-facts.aspx


Lesson Steps:

1)  We looked at the artwork above and at lots of photos of the Great Barrier Reef.  We observed the different shapes, colours and textures of different fish and coral.
2)  The students used the artwork above to help them draw a large fish in the middle of their A3 art paper.  I demonstrated how to do this first.  They were then encouraged to modify their fish by changing the fins, tail, patterns etc, in order to make it unique.
3)  Using photos as a guide, myself and a number of my clever and keen students, drew samples of different fish and coral on the board.  Students watched this modelling and then drew their own coral and fish onto their artwork, also adding in the ocean floor.
4)  I demonstrated to the students how to mix acrylic paint, keep the paint clean and how to outline shapes before filling them in.
5)  I also demonstrated how to use light, shade and varied textures on their fish and coral.  Some of my students had a great go at this tricky technique!
6)  Students painted their artworks and when dry, outlined their shapes in black permanent markers.

Year 3 Student Artworks:


By Andrew


By Kundai

By Ethan


By Ailec

By Denzelle


By Keyan


By Angus

By Tom

By Jia

By Shaun
  
By Liam

3B class artworks
 

Sturt Desert Pea Drawings


By Kaya, (Year 3) 2011
    
Tom, (Year 3), 2011

 Lesson Background:
We had been studying Australian states and territories and their different emblems and icons.  To tie in with these lessons, my teaching colleague Emma Vince came up with the fabulous idea to create some Sturt Desert Pea drawings in the style of Australian artist, Margaret Preston.  We used Preston's artworks and the beautiful artwork below for inspiration.
 Lesson Steps:
1)  We studied the floral emblems of Australian states and territories and looked at photos of each.
2)  We oberved and discussed the features of Margaret Preston's artworks.
3)  Using the artwork by Lyn Weir above, we drew some sturt desert pea flowers.  I modelled how to draw each different stem, leaf and flower and then asked the children to do their own, adding or changing bits to make it individual.
4)  Once the picture was drawn, the students used coloured progresso pencils to colour it in and put a border around the edge in the style of a timber frame.

Year 3 Artworks:


By Kundai
 
By Olivia


By Andrea

Some of 3B's beautiful Sturt Desert Pea artworks

and a few more...


Saturday, 30 July 2011

Edvard Munch's The Scream-inspired artworks

By Tom N. (yr 3 student)
fear of black holes
By Kaya (Yr 3 student)
fear of time
  
Lesson Background:
At the end of the last school term our school held a "health week", where we discussed issues relating to physical, emotional and mental health.  We also discussed child protection issues and how children can "listen to their bodies" when they are in uncomfortable situations (clammy hands, faster heartbeat, sweating, butterflies in tummy, etc).  I thought this topic lent itself to studying the life and art of Edvard Munch and creating an artwork based on his most famous work "The Scream". My idea was to colour a template of "The Scream" using oil pastel and then where the 2 figures are in the background of Munch's original artwork, the children would paste a picture/photo of something that frightens them.

Lesson Steps:
1)  We studied a child-friendly biography of Edvard Munch's life, discussing what sort of artworks we thought he might create, based on the events in his life.
2)  I showed the students pictures of some of his artworks and we discussed his use of line, style, colour, shape etc.
3)  I displayed "The Scream" for the students and asked them to identify what objects were in the painting, how the painting made them feel and what they thought it was called (some very interesting responses!).
4)  We discussed the features and meanings of the artwork.
5)  Students were then asked to brainstorm things we are afraid of, things that worry us or things that make us uncomfortable.  I asked the students to choose 1 fear/worry that they would like to portray in the artwork and I made a list of these fears.  Later that day I used the Internet to find photos of each child's chosen fear, printed them out in colour and stored them away for when the children had completed the colouring of their artworks.
6)  I gave the students a stencil of "The Scream" (found on Google images) and demonstrated how they might like to use the oil pastel to colour each section (ie. water, sky, hand-rail, figure, etc).  After I had demonstrated ideas for a section, they went back to their desks and completed that section on their own artwork.
7)  The students were encouraged to use and blend in multiple colours and to use swirling lines (we had discussed how the movement of the lines and the use of colours added to the mood of fear and overwhelming).
8)  When the artwork was completed, the students selected a photo or picture of their fear, cut it out (no background, just the main image) and stuck it behind their figure on the artwork.  I suggested they make the eyes of the figure look back at the object of their fear.
9)  Students cut out their artwork and backed them on black cardboard.

Year 3 Student Artworks:


By Tim (fear of war)


By Olivia (fear of stingrays)

By Parth (fear of sharks)


By Dane (fear of aliens)

my sample artwork to guide the children (and my fear of needles!)

By Jia (fear of burglars)

By Angus (fear of zombies)


By Dharan (fear of sharks)

By Charlotte (fear of aliens)


By Keyan (fear of ghosts)


By Liam (fear of war)

Wednesday, 22 June 2011

Bruce Gray Animal Oil Pastels


By Janis (year 3 student)
Lesson Background:

Our school had an RSPCA fundraiser last week and so I thought my class would enjoy creating some animal-inspired artworks!  I trawled through Google images and came across the stunning artworks of Bruce Gray.  We based these artworks on Gray's oil pastel drawings...


"Picattso #7" original Bruce Gray artwork that inspired us
Lesson Steps:

1)  We read a brief biography of Bruce Gray.
2)  We looked at photos of his artworks and discussed his use of colour, shape and line.
3)  The students were each given an A3 sheet of art paper.  I demonstrated how to draw large boxes of different shapes and sizes all over the page, which locked in together like jigsaw pieces.
4)  I then demonstrated how to draw simple body parts of animals from different angles (teeth, tails, claws, whiskers, legs, fur, etc).  As I demonstrated each drawing, the children chose one of their boxes on their artwork and copied the body part inside it. 
5)  Once I had demonstrated a range of body parts, the children filled in the rest of the boxes by repeating the body part drawings in different places and using different angles.
6)  I then demonstrated how to outline each shape in coloured oil pastel, colour it in and then use lighter or darker colours to add light and shading.  I also suggested how they could use interesting colour combinations to make their shapes and patterns stand out (e.g. red and yellow, pink and green, purple and orange).
7)  The students coloured their own artworks in, being careful to colour thickly and with no white gaps.
8)  I showed the students how to outline every box and shape with black oil pastel.  The students then went back and outlined their own artworks.

Year 3 Student Artworks


By Andrew (Year 3 student, 2011)


By Andrea G


By Kaya


By Arpita


By Charlotte


By Tom N. (Year 3 student, 2011)


By Charlotte, Andrew, Nick, Dharan. Keyan and Kaya

By Andrea G, Tom N, Aimee, Arpita, Jia and Liam


By Denzelle, Parth, Dane, Kundai, Shaun and Olivia

By Josh and Axel

A sample artwork I made to help guide the students


some of 3B's beautiful oil pastel drawings