Tuesday 12 April 2022

Grade 1/2 Easter Cards


Lesson Steps:
To celebrate Easter, we created these Easter cards. The idea came from http://krokotak.com/2014/04/how-to-make-an-easy-easter-postcard/

 Lesson materials:

1 sheet A4 white card with egg shapes on the bottom half

Coloured textas

1 black sharpie


Lesson Steps:

1. Fold the card.

2. Draw patterns on some of the egg shapes, and turn other egg shapes into chicks and rabbits.

3. Colour with textas.

4. Outline with black sharpie.


Artworks:

My example


Grade 1/2 3D shape artworks


 Lesson Background:

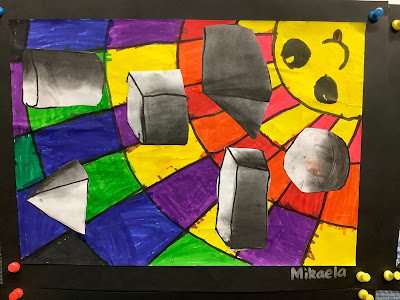
As part of our Maths unit on 3D shapes, we created these 3D shape artworks, based on those from https://iblog.dearbornschools.org/kobeissiart/2020/05/18/2d-shape-vs-3d-form/


Lesson Materials:

1 A4 sheet with the background shapes drawn in

1 A4 sheet of white art paper, folded into 6 squares

coloured textas

1 black sharpie

charcoal

scissors

glue


Lesson Steps:

1.  Colour the background starting with warm colours from the sun and working to cool colours.

2. Model step by step how to draw 3D shapes. The children follow along on the white paper, putting 1 shape in each square.

3. Use the black sharpie to outline the shapes.

4. Model how to use the charcoal to shade the 3D shapes, as the children follow along.

5. Cut the shapes out and stick them on the background.


Artworks:


Grade 1/2 Paper Snowflakes


Lesson Background:

We decorated our classroom door with these beautiful snowflakes. It was a lovely way to start the year, talking about how we are each unique, different and special.


Lesson Materials:

white, light blue and dark blue paper circles


Lesson Steps:

1. We watched some videos and read some books about snowflakes.

2. I demonstrated how to create different shapes and patterns in their snowflakes.

3. The children folded, then cut out their snowflakes.


Lesson Background:

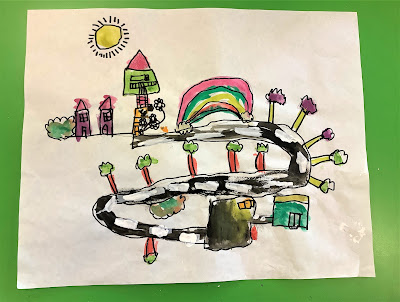
As a part of our Geography unit, we brainstormed places around us and landmarks near our homes and school. We then created these artworks trying to show some of these places.

Lesson Materials (per student):

1 A3 sheet white art paper

watercolour paint

1 black sharpie


Lesson Steps:

1. The  children drew the features around their homes with lead pencil.

2. The children then painted their pictures.

3. When dry, the children outlined their drawings with black sharpie.


Student Artworks:


Charlie & the Chocolate Factory Candy Drawings


Lesson Background:

We started the year by reading "Charlie and the Chocolate Factory" by Roald Dahl as our class novel. We created these little artworks and also linked our data unit in Maths to the book by graphing which treat we would try first if we ever won a golden ticket.


Lesson Materials (per student):

half an A4 sheet white paper

Coloured pencils

A black sharpie

a lead pencil

1 sheet gold card (slightly larger than the art paper)


Lesson Steps:

1. Use Art for Kids Hub Art for Kids Hub - YouTube to do some directed drawings of a range of sweet treats using lead pencil on the art paper.

2. Colour with coloured pencils.

3. Outline with black sharpie.

4. Stick the artwork onto the gold card.

Grade 1/2 Watercolour Self Portraits


Lesson Background

I have a beautiful new Year 1/2 class. We made these portraits in week 1 of the new school year as part of our getting-to-know-you activities. I took the basic idea from http://thetalkingwallsmurals.blogspot.com/2013/01/paul-klee-inspired-self-portrait-lesson.html and just changed the materials to match what I had available.

Lesson Materials (per student)

1 A4 sheet of white art paper

watercolour paint

1 black sharpie


Lesson Steps

1. Show students how to draw a face using step-by-step instructions.

2. Children follow along, drawing their face using lead pencil.

3. Use watercolour paint to paint sections of the background.

4. When dry, outline the portrait in black sharpie.


Artworks: