Friday 26 November 2021

Fireflies - Grade 1

1B artworks

 Lesson Background:

Our spelling word of the week was "glow" this week, so we spent the week researching fireflies. We watched many videos, read many books and created our own book. We created these artworks using the amazing idea from this website, with just a few changes: http://kathy-angelnik.blogspot.com/2015/06/glow-in-dark-firefly-art-lesson.html


Lesson Materials (per student):

1 jar template on white A4 paper (I just used Google images)

Blue, purple and yellow dye (I used Kindergarten fun dye)

Silver and gold texta

a small blob of white paint

a cotton bud

1 black sharpie

1 lead pencil

1 orange texta

gold glitter glue

a paintbrush for each of the inks and the glitter glue


Lesson Steps:

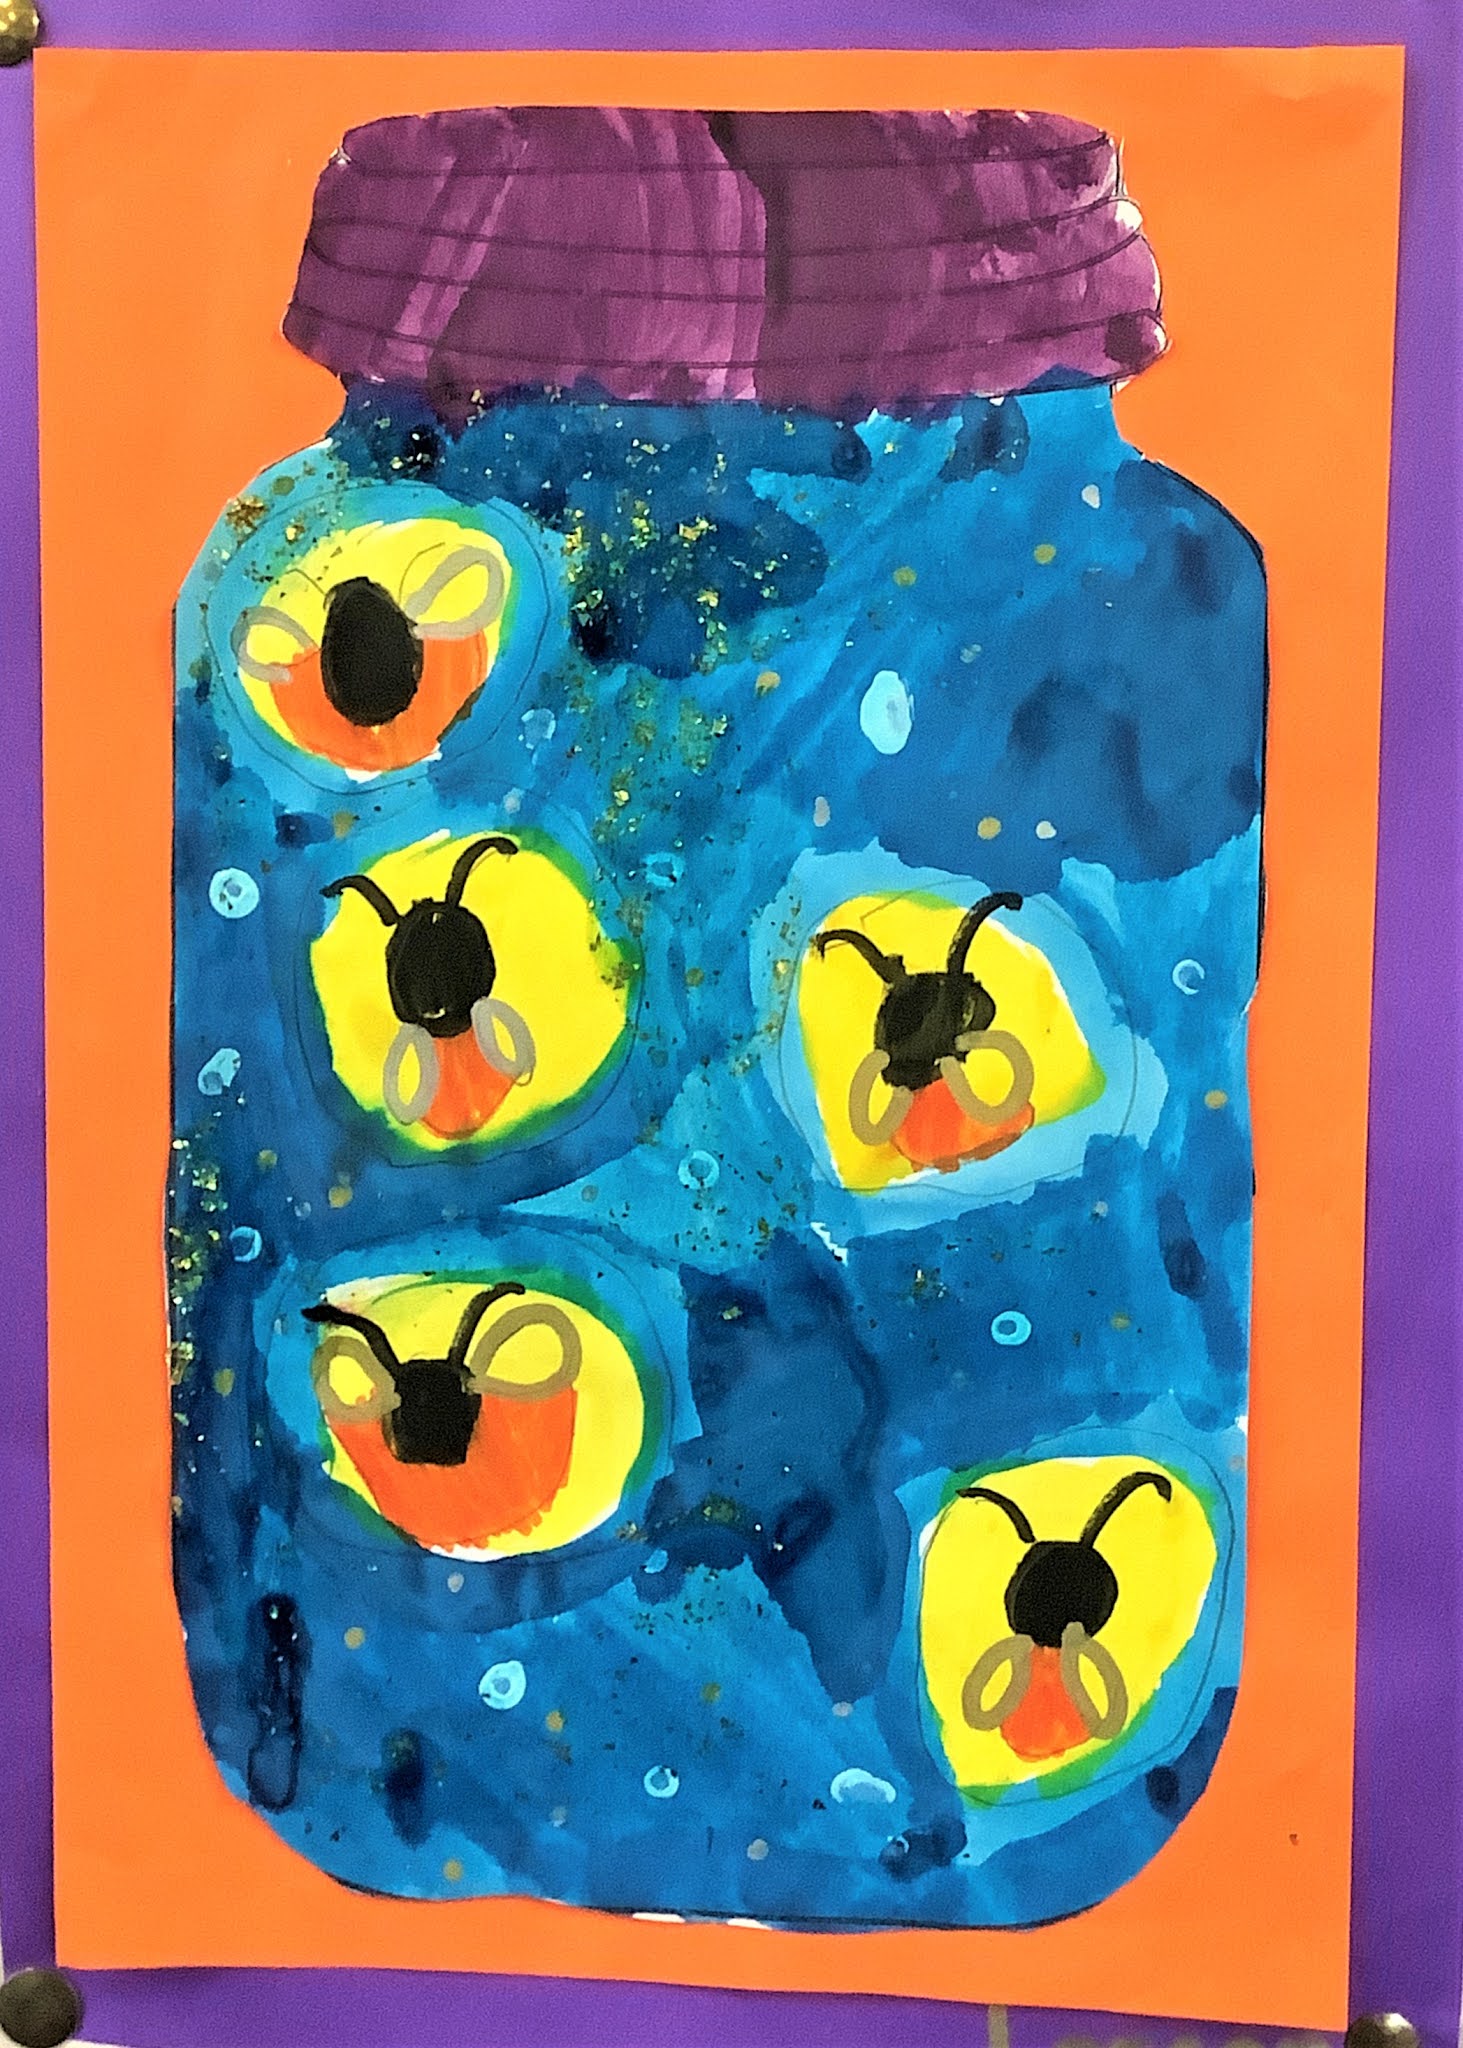
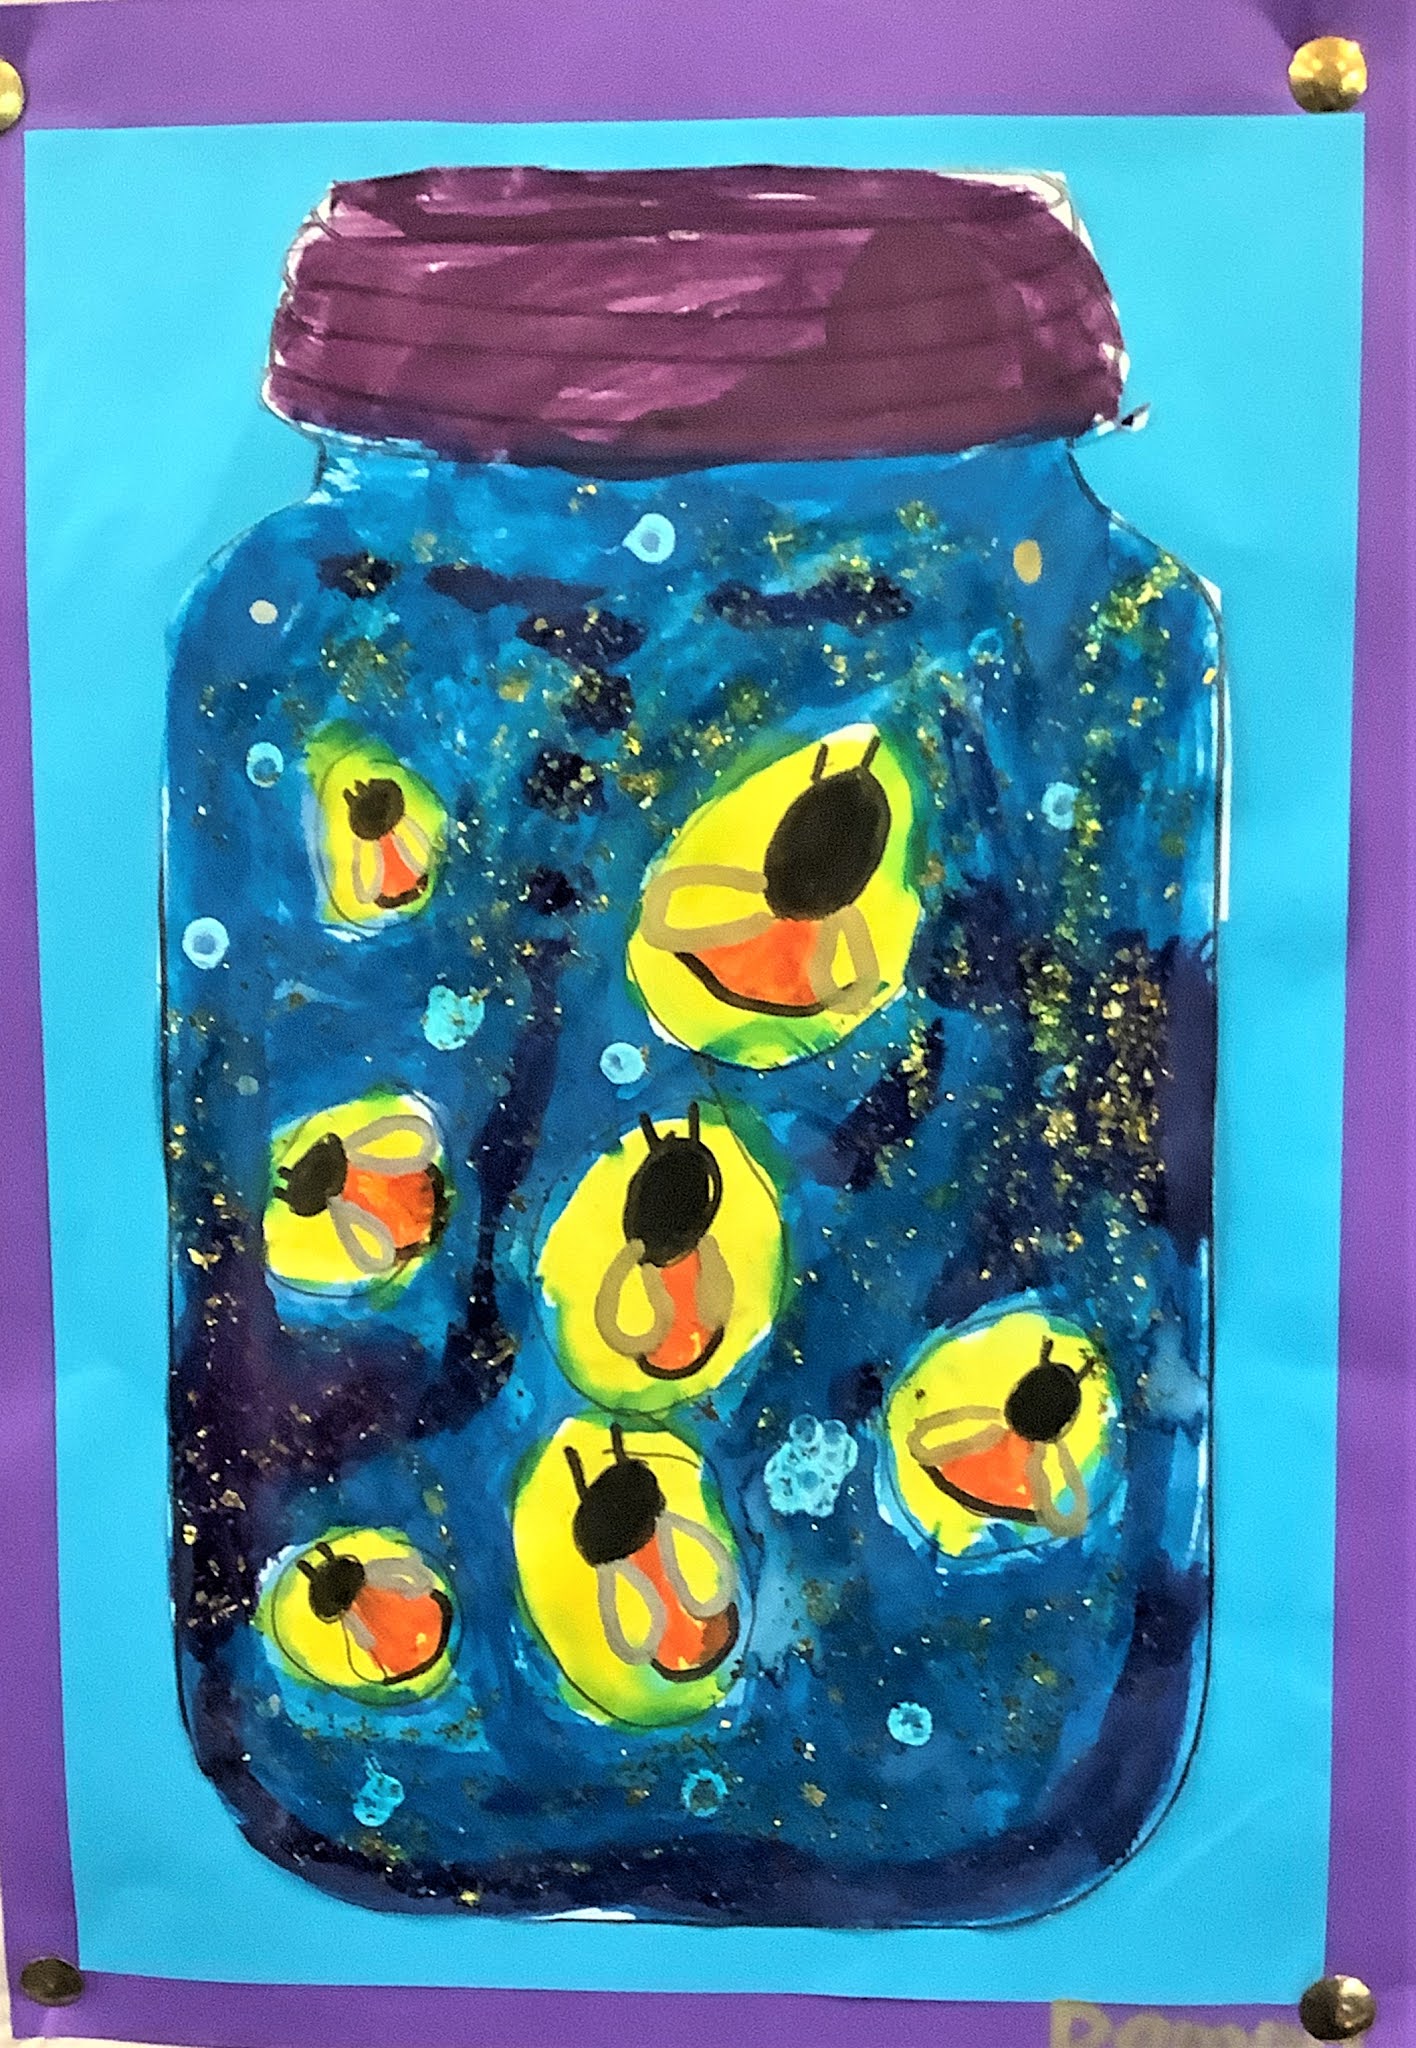
1.  We drew the fireflies onto the jar template with a circle around each, with me demonstrating out the front.

2.  We used the purple ink to paint the jar lid, the blue ink to paint around the fireflies, and the yellow ink to paint inside the firefly circles and over the fireflies (warn the children not to paint the yellow too near any big blobs of blue ink- use a tissue to mop up any pooling blue ink first).

3.  We used the purple ink to make a few shadows in the blue jar, and the blue ink to make a few shadows in the purple lid.

4.  We waited until the ink was dry, then used the black sharpie to colour the fireflies' heads and outine the rest of their bodies.

5.  We used the orange texta to colour the fireflies' bottoms.

6.  We used the gold and silver pens, and the cotton bud dipped in white paint to dot circles of different sizes all over the blue.

7.  We covered over the blue with a layer of glitter glue.


Student Artworks:


By Olive

By Immy

By Emma

By Sera

By Lorcan

By Damon

By Isabel


Tuesday 23 November 2021

3D Insect Art - Grade 1


 Lesson Background: I got this idea from : https://www.teacherspayteachers.com/Product/Doodlebug-3D-art-project-6864635?st=7a5302f47409473939e1a960735b8b51


Lesson Materials:

templates from the above product printed onto A4 card 

Green acrylic paint for the lead (or print the template onto green paper)

Good quality coloured textas

A gluestick

Scissors

A sheet of black backing paper


Lesson Steps:

We followed the video in the above link, with the only difference being that we painted our leaf template with green acrylic paint, as our school had run out of green paper!


Student Artworks:


Zentangle Bugs - Grade 1


Lesson Background:

As a part of our minibeasts unit, I decided to try making these zentangle bug artworks: https://www.tes.com/teaching-resource/mark-making-bugs-11278910


Lesson  Materials:

1 template enlarged onto A3 paper from https://www.tes.com/teaching-resource/mark-making-bugs-11278910

1 black fine tipped texta


Lesson Steps:

1.  We watched this Youtube video and practised zentangle patterns on some scrap paper: https://www.youtube.com/watch?v=zXWB4VhyKSg

2.  I modelled examples of successful and unsuccessful (large shapes, spacing not thought out, big gaps, boring patterns, lack of symmetrical patterns) zentangles on the board and we agreed as a class on what we would all try to achieve in our artwork.

3.  The students used their practise zentangles plus the ideas on the template to draw their patterns in.

4.  The students then cut out their bugs.


Student Artworks:


Ladybeetle oil pastel art


Lesson Background:

We have been studying minibeasts this term, and so I decided to make one of the weeks all about lady beetles.  We researched them with videos and books, we wrote information reports, and we created these beautiful artworks. I got the idea for the artworks from this website: https://vk.com/album-102299976_245103850


Lesson Materials:

1 sheet A3 art paper, trimmed

1sheet A3 backing paper

oil pastels

a lead pencil


Lesson Steps:

1.  We drew the lady beetle, with me modelling each step as they followed along with a lead pencil. I then showed them how to draw large leaves in the background, which they followed along with, placing them and sizing them according to their own preference.

2.  I encouraged to children to decide how many spots (7, like the most common ones we had read about in our research? Or they could choose their own).

3.  We began colouring the lady beetles by drawing and filling in a large yellow circle on the lady beetle wings, then surrounding it with a thin layer of orange, then colouring the rest of the lady beetle red, trying to make sure there were no white gaps left. After the lady beetle was coloured, I showed them how to use the yellow oil pastel to then go back and, in a circular motion, colour around and out of the yellow spot again, to help blend the yellow/red/orange.

4. I encouraged the children to colour in the leaves using different shades of green and possibly drawing the veins of the leaves in if they wished to. They were then shown how to fill in around the leaves with other shades of green.

5. The children outlined their ladybeetles with black oil pastel.

6.  We stuck the pictures onto backing paper.


Student Artworks:


Remembrance Day Poppies


 Lesson Background: We learnt about what Remembrance Day is and why it is important. We read a picture book called "A Poppy is to Remember" by Heather Patterson and then made these lovely poppies, which were the idea of my colleague Mrs Hart.


Lesson Materials (per student):

1 small sheet black paper or card

1 lead pencil

5 red tissue paper petals (we had these pre-cut, but with older children I would have got them to cut them out)

1 gold pen (I shared 1 pen per table group)

1 black sticker dot

glue


Lesson Steps:

1. Draw 1 long tall stem with a lead pencil and then another next to it, curved over "like a candy cane".

2. Stick the petals around the tops of the first stem.

3. Place a black sticker dot inside the first poppy.

4. Rip a small shred of red tissue paper to place inside the second poppy, to look like a bud about to bloom.

5. Use the gold pen to draw some gold dots inside the black sticker dot and to trace over the stems.


Handwashing Artwork - Grade 1


My sample

Lesson Background:

After an 11 week lockdown, I decided some handwashing activities would be the perfect start back at school. We did experiments to show how soap works, learnt a hand washing song, and then made these artworks.

Lesson Materials: (per student)

1 white, 1 pink, 1 pale blue and 1 purple oil pastel

1 sheet A4 black card or paper

1 sheet A4 coloured paper

Lyrics to a handwashing song or class-made rules/expectations

Small and medium-sized circles to trace around (we used glue stick lids and the lids off some of my big teacher stamps)

Scissors

Glue


Lesson Steps:

1. Using the white oil pastel and some circle shapes, trace circles all around the page

2. Inside the circles, put curved lines in the corners using the pink, light blue and purple oil pastels

3. Fold a sheet of coloured paper in half and trace one hand onto it. Cut out so that you have 2 hand templates.

4. Place the hands onto the bubbles page.

5.  Cut out and stick the lyrics on top.


Wednesday 4 August 2021

Character Strengths Watercolour Paintings - Grade 1


By Margot 

Lesson Background:

Our school staff have undertaken professional development in Positive Education and the VIA Character strengths.  I was instantly intrigued and went and bought a copy of Dr Lea Waters book "The Strength Switch" which I found very enlightening.  I now refer to character strengths on an almost daily basis in my classroom, such as when analysing the actions and personalities of characters in books, describing characteristics needed to complete certain tasks and also when referring to students' own character strengths in order to show them how they can use their strengths to solve a problem.  I created my own version of a character strengths survey/quiz for my class using Grade 1-friendly language, and then the children all tried to determine their own set of strengths.  Afterwards, we created these artworks.  


Lesson Materials: (per student)

Character strengths quiz/survey (I created my own but if you had older students you could use the VIA character strengths youth surveys online)

1 sheet A4 white art paper

watercolour paints and brushes

water pot

black permanent marker/sharpie

a copy of character strength labels in interesting fonts (I created my own)


Lesson Steps:

1. Complete a survey to identify your top character strengths.

2.  Use black sharpie to trace the character strength words from a template.  (We leant against our classroom windows to make tracing easier.)

3.  Use the sharpie to draw borders, pictures and/or decorative items.

4.  Paint with watercolours.

5.  Re-outline any sections that were made unclear with the paint.


Grade 1 Artworks...

By Aditri

By Augie

By George

By Louie

By Isabel

By Max

By Neve

By Olive

By Surafel


By Eliana